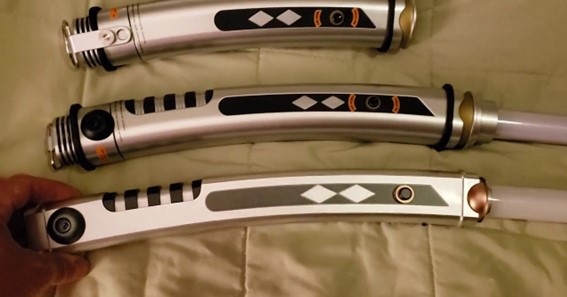
These are the force fx lightsabers instructions. Please be aware that modifications may be made to improve the usefulness or quality of our goods since we are always improving and updating them.
We constantly innovate in order to give our clients the greatest sabre experience possible. To that end, while we do try to keep these instructions current, if you have older electronics or we haven’t yet updated the website, some functionalities may be different.
Please don’t hesitate to contact us via email or messenger if you encounter any issues or need assistance understanding how your saber functions
We wish you many fun with your lightsaber!
Below are instructions for base-lit sabers of all generations, including xenonpixel blade rebel saber.
Both model kinds are covered in the first section’s discussion on correct charging and safety measures.
The next sections will go into further information about each model. Finally, we discuss battery removal for thick and normal neck hilts in case it’s required.
click here – Five Important Reasons to Get a Home Warranty Plan Today
Information on safety and charging your sabers:
- Please charge your sabre completely before using it for the first time. Time spent playing and charging is approximately 4 hours.
- Please charge devices with usb ports or a 5v/2amp max wall charger (no iPad or fast chargers, smart chargers, or fast chargers are allowed). Damage brought on using unsuitable charging equipment is not covered by warranty.
Any outputs from your charging brick that are greater than 5 volts and 2 amps will harm your board and are not covered by the guarantee.
A few models. The low voltage protector (safety feature) engages when the battery is entirely discharged. The battery just needs to be taken out and put back in once to make the sabre usable again.
- Your sabre features a charging port that is either directly above the power button or is located at the pommel’s base (on movie replica sabers)
- Connect the usb end to a charging block with a maximum of 5.0v and 2amps of power.
- When you insert the other end into your saber’s charging port, it should say “charging” or light up (or both). When the charge is finished, you’ll hear it announce “ready.”
- Depending on the amps on your charging brick, this takes around 4 hours. Once more, don’t use more than 2 amps.
The battery needs to be taken out and charged separately if you were given a charging cradle. When the battery is fully charged, the cradle turns from red to blue or green. Use a charging brick that is no more than 5.0v/2amp. It takes about 4 hours to do this.
click here – Why Delta 9 Lollipops Are The Best For Your Health?
Setting up the blade:
If there is a plastic or rubber cap on the flat end, take it off first. Then take off the plastic wrap that is covering the blade’s outer edge.
Important: the clear paper you may notice inside the blade is diffusion paper, which must stay there.
The inside of the hilt will contain an led within the emitter, or a “pogo pin” if you’re using a pixel blade. Insert the flat end of the blade into the top half of the sabre.
Find the tiny silver bag containing the Allen key and screws
By placing one of the blade-retention screws in one of the holes on the side of the emitter and tightening firmly with the Allen wrench, you may hold the blade firmly and flush against the emitter chamber wall. Avoid overtightening.
Since this increases the surface area of contact between the blade and the emitter wall, only one screw should be required.
Since the emitter is shallower than those on most sabers, you’ll probably need to install all of the blade retention screws on the thin neck sabers (heroes & sage). Try one or more and see one you like the most.
The screws shouldn’t be overtightened; they should be snug. If you spin the screw too firmly, though, you run the danger of stripping it, which will be a pain to fix.

