
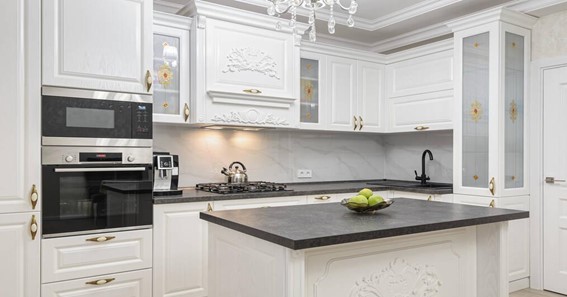
Types of Kitchen Flooring
When it comes to kitchen flooring, there are many choices available. Depending on your needs and budget, you can choose from a wide range of materials that offer various levels of performance and style to suit any taste.
From classic tile options to modern laminate and vinyl, here is a look at some popular types of best kitchen floor tiles.
- Tile: Tile is one of the most popular options for kitchen flooring due to its durability, water-resistance, and ability to withstand heavy foot traffic. Porcelain tile is the most popular choice for kitchens due to its inherent strength and stain-resistant properties; however, ceramic tiles are also an option if you’re looking for something with more color variety. Natural stone tiles like marble or granite can add a luxurious look but may require more maintenance than other materials.
- Hardwood: Hardwood floors bring an elegance and warmth that no other material can match – plus they’re incredibly durable when cared for properly with regular waxing or polishing. However, hardwood floors may not be ideal in high-traffic areas as they are prone to scratching or denting over time; they also require periodic refinishing in order to keep their original luster intact.
Measurement and Cost for Kitchen Floor Installation
The installation of a new kitchen floor can be a daunting task, but with proper planning and measurements, it can be done quickly and efficiently. Measuring the area to be covered and obtaining an accurate cost estimate are two essential steps in the process.
When measuring for kitchen floor installation, it is important to take into account all of the available space in the room. Measure along each wall from corner to corner, noting any irregular shapes or protrusions that will need to be accounted for when ordering materials. It is also important to measure any appliances that may need to fit into place after the floor has been installed. Once all of these measurements have been taken, you should add up all of them together for an exact measurement of how much material will be needed for your project.
Costs for installing a kitchen floor vary depending on several factors including type of material used as well as size and complexity of design. Popular materials include hardwood, tile, laminate and vinyl which range in price from around $2 per square foot up to more than $20 per square foot depending on quality and brand name selection. Installation costs are typically calculated by multiplying the size (square footage) needed by both material costs plus labor rates which can range from around $3.
Click here – Unlock the Potential of Your Data with Data Analytics Tools
Preparing the Subfloor for Installation
Preparing the Subfloor for Installation is a critical step in any flooring project. Whether you are installing hardwood, laminate, vinyl, or carpet, having a properly prepared subfloor is essential for a successful installation and long-term durability of your chosen flooring material.
Before beginning any installation project, it’s important to understand what type of subfloor you have and what prep work needs to be done. Most residential subfloors are made from plywood or OSB (oriented strand board). Plywood is typically used in two-story homes while OSB works well for single-story dwellings. It’s important to check that the subfloor is structurally sound before proceeding with any additional steps.
The next step in preparing the subfloor for installation is to make sure it’s level and flat. Uneven surfaces can cause problems with flooring materials such as buckling or uneven wear over time so taking the time to ensure that everything is as level as possible will save you headaches down the road. Start by checking for high spots using a long straight edge such as a 4-foot level or ruler then fill in dips with patching compound if needed before sanding smooth with an orbital sander and 80 grit sandpaper.
Installing the Tile Flooring
Installing a new tile flooring in your home can be an exciting and rewarding experience. With careful planning and preparation, you can create a beautiful floor that will last for years to come. Whether you’re installing ceramic, porcelain, or stone tiles, the process is essentially the same.
Before you begin any tile installation project, make sure to check with local building codes regarding the specific requirements for your project. You may also need to obtain any necessary permits before beginning work on your home. Once all of these steps are complete, it’s time to get started!
The first step in installing tile flooring is preparing the subfloor. This includes removing any existing floorcoverings (such as carpet or vinyl), and then making sure that the subfloor is clean and level. If necessary, use a self-leveling compound to fill in any low spots on the subfloor before laying down backer board or cement board as a base for your tiles.
Next comes laying out and cutting the tiles according to their shape and size so they fit together properly without leaving unsightly gaps between them when installed on the floor. This process can be time consuming but it’s essential for creating an attractive finished product with no visible seams.
Sealing and Grouting the Tiles
When it comes to home improvement, no project is complete without sealing and grouting the tiles. Sealing and grouting can make a huge difference in the look and feel of your tile surfaces. It also helps to protect them from damage caused by water, dirt, and other liquids that can seep into the cracks between tiles. Here’s what you need to know about sealing and grouting your tiles.
Sealing is an important part of maintaining tile surfaces because it helps keep moisture from penetrating through the surface of the tile into its underlying substrate or subflooring material. Sealing also helps prevent stains from forming on or around your tiles. To seal a tiled surface, simply apply a sealant using a brush or roller in an even layer across all tiled areas until they are fully covered. Allow the sealant to dry before applying any further products such as paint or grout.
Grout is used for both decorative purposes as well as to fill any gaps between individual tiles that may exist due to installation errors or unevenness in the subsurface beneath them. Grout can be purchased pre-mixed but if you choose this option, make sure it’s specifically designed for use with ceramic tile because some products are made only for stone.
Click here – Safeguarding Your Business from Web Application Security Hazards
Caring for a Tiled Kitchen Floor
If you have a tiled kitchen floor, caring for it is essential. Tiled floors can be both beautiful and durable, but they require regular maintenance to stay looking their best. Here are some tips to help you keep your tiled kitchen floor looking great for years to come.
- Sweep or vacuum the floor regularly. Dirt and debris can build up quickly on a kitchen floor, so it’s important to sweep or vacuum it at least once a week to prevent scratches and damage from accumulating over time. You should also mop your tile periodically with mild soap or a specialized tile cleaner, as this will help keep the tiles clean and prevent dirt from settling into the grout lines between them.
- Use mats near entrances and exits to reduce dirt tracking in from outside sources such as shoes or pets. This will help protect your tiles from scratches caused by things like stones that can get stuck in the soles of shoes and dragged across the floor’s surface when walking across it with bare feet or slippers on too! Mats also act as buffers against moisture that may come in through these entryways which could cause mildew growth if left unchecked – so make sure you use them!