
Lighting a video shoot can be tricky if you’re just starting out. There is a big difference in how our eyes perceive light compared to camera lenses. Cameras need more light than you think to produce high-quality images. Also, the light needs to come from the right direction. If you haven’t invested time or money in the lighting process, it’s time to start. Do yourself a big favor and prepare and plan the video light. The good news is that you don’t have to be a pro to get great lighting! No matter your budget or experience, we’ll guide you through the process we use at TechSmith to get the perfect lighting for all your videos. Not all best video lights require professional lighting. But some extra production might help. Here are some great tips and tricks on how to get the perfect lighting for your video.
click here – 7 Things to Know about Using the Services at Chudovo.com for the First Time
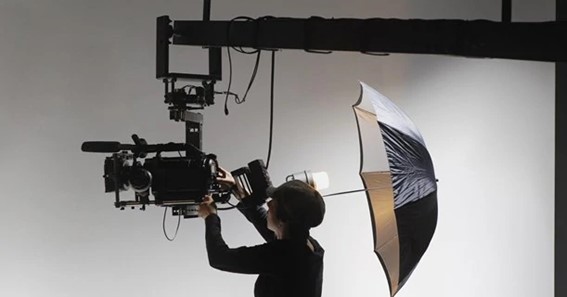
How to set up a video light for shooting?
Setting up video lighting for your webcam isn’t difficult. Here are some tips for using video lighting:
- Make sure you have enough light. If not, please add some portable light for shooting! We’ll discuss the different types of lighting you can buy later in this blog.
- Make sure your face is evenly lit with no unwanted shadows. You may need to adjust the position or position of the light source to do this.
For a low-budget solution, try shooting with the window behind the camera and the light shining on your face. Using natural light is a good option if you can. If not, there are plenty of inexpensive ring light setups that will work just fine. And more for the perfect video light setup.
Step 1: Prepare to shoot
It is always a good idea to check your site ahead of time. Think of the natural light that penetrates the windows and casts shadows, and be aware that the weather can change quickly and impair your lighting. That beautiful day will soon disappear. Even if it doesn’t disappear permanently, the changing light can wreak havoc on your lighting when the sun disappears from behind the clouds and reappears. Be prepared for any changes or make adjustments to keep lighting consistent. The best shooting environments are those where you have as much control over the lighting as possible.
click here – Top 5 tips for a successful start-up business
Step 2: Choose Lighting Type
Ultimately, if your shooting location has some amazing natural light, that’s by far the best (and cheapest) option. However, if you don’t have access to natural light, or you find it particularly inconsistent for your shooting purposes, there are plenty of other lighting types to choose from like video light.If you choose natural light, make sure it illuminates your face evenly and doesn’t create unwanted shadows. If you choose this option, use bulbs of the same temperature and brightness in each light to ensure consistency. There are also several types of lighting to be aware of. Light without a filter is called glare. Think about the difference between a lamp with a bare bulb and a lamp with a shade. It will be brighter without shadows, but the light can be harsh and cast deep shadows. Diffuse helps spread the light evenly, creating soft light that can be improvised even on a budget. Therefore, when using clip lights, we strongly recommend using some type of diffusing material. You can buy diffuser paper and stick it to your lights, or even cut out frosted shower curtains. Feel free to get creative! These lights can also bounce off surfaces like walls, ceilings or reflectors to produce soft light, which is far better than blinding your subject and creating an unflattering image.
Step 3: Set up 3-point lighting
The most common luminaire is called three-point lighting. There are headlamps, filling lamps, and backlights (sometimes called “flashlights”). The main light is at about four o’clock. It should be the brightest of the three and give your subject most of the light. The fill light is about 8 points and removes the shadows caused by the key light. Your fill should be about half the strength of your key so it still removes shadows but doesn’t produce a flat shot because the fill and key light for video recording are matched too closely. The backlight is between one and two, separating your subject from the background. This creates depth and prevents portable light for video shooting planes. Your backlight can be bright (no diffuse) because it doesn’t create camera-visible shadows on your subject’s face.If you want to make YouTube video camera light, demo videos, webinars, and more, Three Point Lighting is for you
Step 4: Choose Your Light Color Temperature
Not all video light setups are created equal. Depending on the type of bulb, the light may appear “cooler” or “warmer” on the camera. The human eye can also perceive this difference. Consider the look of a doctor’s office (cold fluorescent professional video lighting) compared to a comfortable living room environment. Warmer light generally has more yellow, while cooler light has a more white or bluish tint. This concept is called color temperature, and it can be measured in Kelvin (see image below.)As we said before, it’s best not to mix lights of different color temperatures. I recommend looking for daylight-colored bulbs, around 5000K.